ICGOO在线商城 > 工具 > 压接器,施用器,压力机 > 58583-1

 Datasheet下载
- 型号: 58583-1
- 制造商: CORCOM/TYCO ELECTRONICS
- 库位|库存: xxxx|xxxx
- 要求:
| 数量阶梯 | 香港交货 | 国内含税 |
| +xxxx | $xxxx | ¥xxxx |
查看当月历史价格
查看今年历史价格
58583-1产品简介:
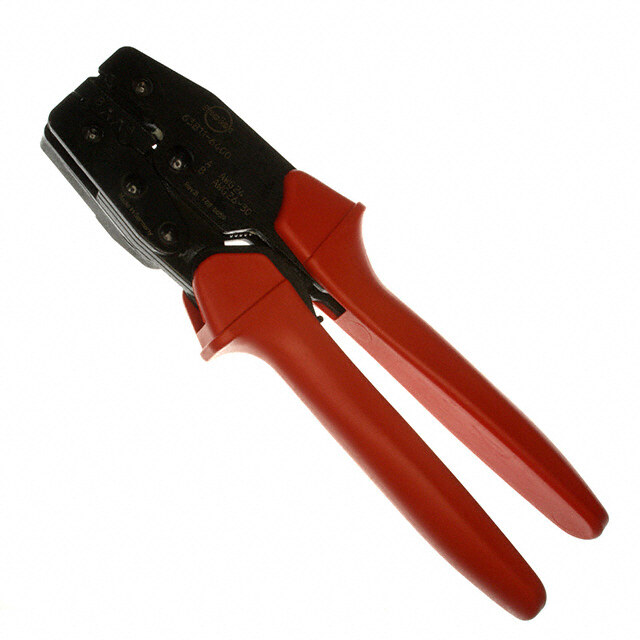
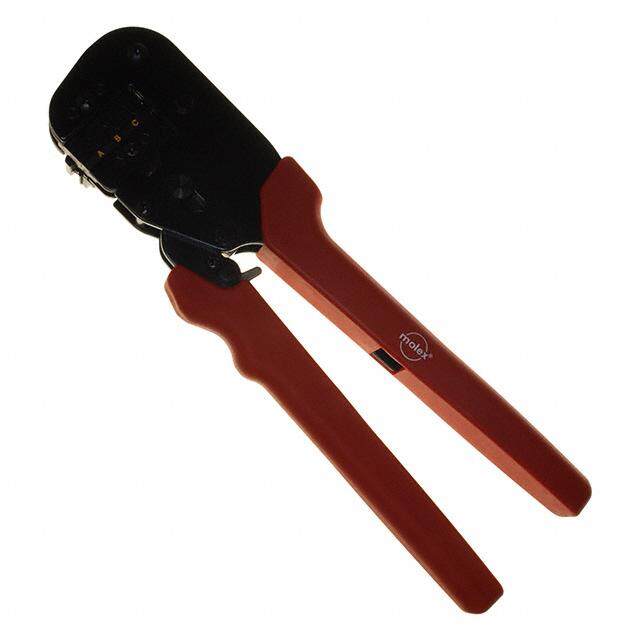
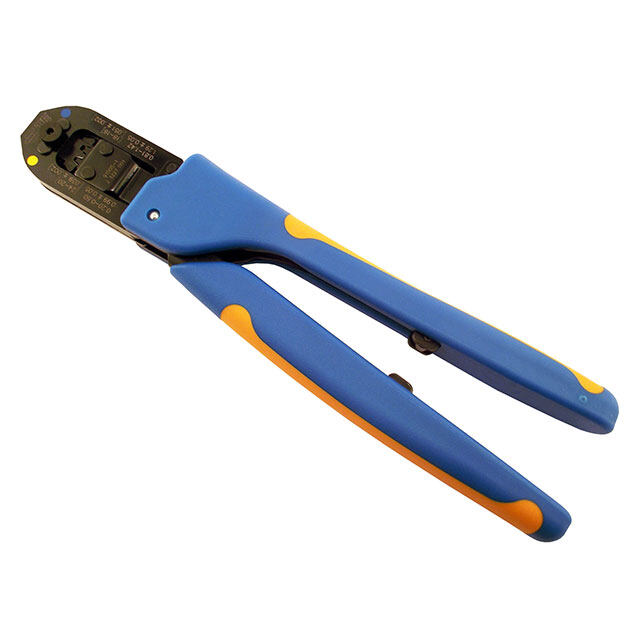
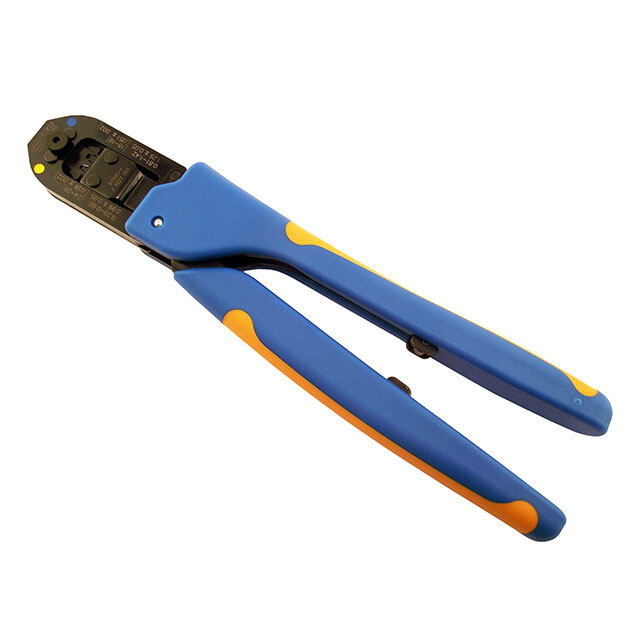
ICGOO电子元器件商城为您提供58583-1由CORCOM/TYCO ELECTRONICS设计生产,在icgoo商城现货销售,并且可以通过原厂、代理商等渠道进行代购。 58583-1价格参考。CORCOM/TYCO ELECTRONICS58583-1封装/规格:压接器,施用器,压力机, 手动压接器 工具 矩形触点,15-18 AWG 侧面插入,棘齿。您可以下载58583-1参考资料、Datasheet数据手册功能说明书,资料中有58583-1 详细功能的应用电路图电压和使用方法及教程。
TE Connectivity AMP Connectors的58583-1型号属于压接器、施用器和压力机类别,主要用于电线端子的压接操作。其应用场景广泛应用于工业制造、汽车电子、通信设备、家用电器以及航空航天等领域。以下是该型号的一些具体应用场景:

1. 汽车制造:在汽车线束装配中,58583-1用于将端子快速、可靠地压接到电线端部,确保电气连接稳定,适用于传感器、控制单元和照明系统等部件的电线连接。

2. 家电生产:在家用电器(如冰箱、空调、洗衣机)的组装过程中,此工具可用于压接电源线或信号线端子,保证电器内部电路的正常运行。

3. 工业自动化:在工厂自动化设备中,该压接器可帮助完成各种控制电缆和信号电缆的端子连接,支持PLC、传感器和执行器等设备的安装。

4. 通信设备:对于通信基站、网络设备和其他电信设施,58583-1能够实现高效且高质量的电线端子压接,满足高可靠性要求。

5. 航空航天:在对精度和可靠性要求极高的航空航天领域,该工具可用于飞机内部布线系统的端子压接,确保关键系统的电气连接安全。

6. 手工维修与定制项目:除了大规模生产,58583-1也适合技术人员在维修或小批量定制项目中使用,提供精确的手动压接功能。

总之,58583-1以其高效的压接性能和可靠性,成为众多行业中电线端子连接的理想选择,适用于多种类型的端子和导线规格,简化了电气连接的操作流程。
| 参数 | 数值 |
| 产品目录 | |
| 描述 | TOOL HAND CRIMP SUPRSEAL W/DIE折皱器 PROCRIMP HT&D SUPRSE |
| 产品分类 | |
| 品牌 | TE Connectivity |
| 产品手册 | |
| 产品图片 |
|
| rohs | 不可用不适用 / 不适用 |
| 产品系列 | 折皱器,TE Connectivity 58583-1Pro-Crimper III,Superseal,AMP |
| 数据手册 | http://www.te.com/commerce/DocumentDelivery/DDEController?Action=srchrtrv&DocNm=408-4165&DocType=SS&DocLang=EN |
| 产品型号 | 58583-1 |
| 产品 | Crimpers |
| 产品种类 | 折皱器 |
| 其它名称 | 585831 |
| 商标 | TE Connectivity |
| 工具类型 | 手动压接器 |
| 工厂包装数量 | 1 |
| 标准包装 | 1 |
| 特性 | 侧面插入,棘齿 |
| 特色产品 | http://www.digikey.cn/product-highlights/zh/procrimper-iii-hand-tools/52602 |
| 类型 | Crimp Hand Tool |
| 视频文件 | http://www.digikey.cn/classic/video.aspx?PlayerID=1364138032001&width=640&height=505&videoID=3630218868001 |
| 配套使用产品/相关产品 | 矩形触点,15-18 AWG |
| 配用 | /product-detail/zh/183025-1/A106304-ND/2054255/product-detail/zh/183024-1/A106212-ND/2054254 |


- 商务部:美国ITC正式对集成电路等产品启动337调查
- 曝三星4nm工艺存在良率问题 高通将骁龙8 Gen1或转产台积电
- 太阳诱电将投资9.5亿元在常州建新厂生产MLCC 预计2023年完工
- 英特尔发布欧洲新工厂建设计划 深化IDM 2.0 战略
- 台积电先进制程称霸业界 有大客户加持明年业绩稳了
- 达到5530亿美元!SIA预计今年全球半导体销售额将创下新高
- 英特尔拟将自动驾驶子公司Mobileye上市 估值或超500亿美元
- 三星加码芯片和SET,合并消费电子和移动部门,撤换高东真等 CEO
- 三星电子宣布重大人事变动 还合并消费电子和移动部门
- 海关总署:前11个月进口集成电路产品价值2.52万亿元 增长14.8%

PDF Datasheet 数据手册内容提取
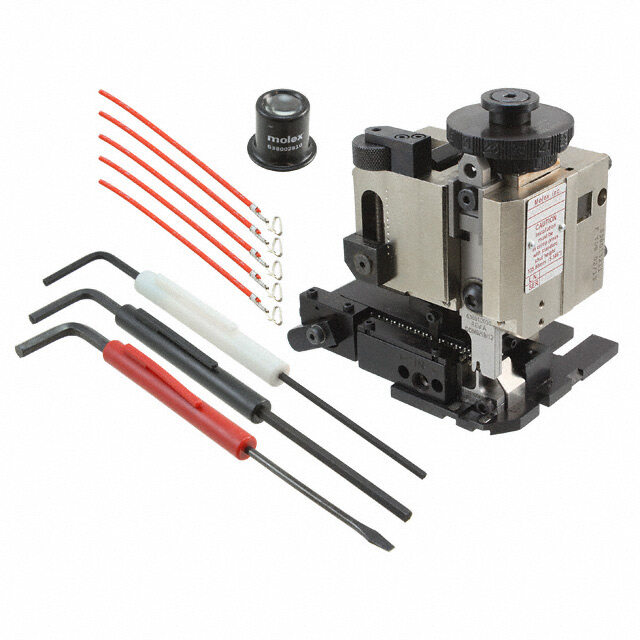
(cid:27)7<=;>,=287#1..= (cid:27)(cid:28)(cid:26)(cid:5)(cid:16)(cid:28)(cid:22)(cid:24)(cid:27)(cid:18)(cid:28)(cid:4)(cid:22)(cid:22)(cid:22)(cid:21)#-&(cid:16)0*,/*-( (cid:11)(cid:7)(cid:14)(cid:5)(cid:11)(cid:8)(cid:13)(cid:12) (cid:30)..+(cid:15)11’,$+5(cid:12)(cid:14)(cid:12)(cid:14)(cid:10)(cid:5)(cid:8)4*2) (cid:17)*’(cid:15)11’,$+5(cid:12)(cid:14)(cid:12)(cid:14)(cid:10)(cid:5)(cid:9) (cid:10)(cid:11)(cid:30)(cid:19)’(cid:9)(cid:18) ".?(cid:19) (cid:27)(cid:28)(cid:26)(cid:27)(cid:18)(cid:28)(cid:31)(cid:29)(cid:18)(cid:20)(cid:31)(cid:22)(cid:17)(cid:18)(cid:23)(cid:22)(cid:25)(cid:18)(cid:29) (cid:21)>6>5*=2?.$;*>6*(cid:22)2<8;-.;<,*7;.<>5=/;86=1.9;85870.-><.8/6*7>*55B98@.;.-1*7-=885<(cid:8)(cid:26)*7-=885<*;.27=.7-.-/8;8,,*<287*5><.*7-58@?85>6. *9952,*=287<(cid:8)(cid:19)@2-.<.5.,=2878/98@.;.-*9952,*=287.:>296.7=/8;.A=.7-.-(cid:7)><.(cid:6)9;8->,=28789.;*=287<2<*?*25*+5.(cid:8) (cid:29)8,*=8;(cid:19)<<.6+5B #=*=287*;B (cid:3)#>9952.-@2=1(cid:22)2. (cid:28)*@ (cid:19)<<.6+5B(cid:4) (cid:20)*,48/$885 (cid:3)&2;.#2-.(cid:4) (cid:24);87=8/$885 (cid:3)(cid:29)8,*=8;#2-.(cid:4) !2?8= !27 !" (cid:7)(cid:21)"(cid:27)(cid:30)!(cid:23)"(cid:27)(cid:27)(cid:27)(cid:26)*7- (cid:22)2.(cid:19)<<.6+5B (cid:21);269270$885(cid:24);*6. (cid:14)(cid:17)(cid:14)(cid:17)(cid:12)(cid:7)(cid:11) (cid:30)8?270 (cid:12)(cid:14)(cid:13)(cid:18)(cid:13)(cid:9)(cid:7)(cid:10) (cid:3)(cid:13)(cid:9)(cid:17)(cid:7)(cid:18)(cid:18)(cid:12)(cid:9)(cid:4) (cid:28)*@ "*=,1.= (cid:19)-3><=6.7= &1..5 #=*=287*;B (cid:26)*7-5. $1.!" (cid:7)(cid:21)"(cid:27)(cid:30)!(cid:23)"(cid:27)(cid:27)(cid:27)(cid:26)*7-(cid:21);269270$8852<*C(cid:21)866.;,2*5(cid:2)0;*-.=885*7- (cid:30)8?270 2<-.<207.-9;26*;25B/8;/2.5-27<=*55*=287(cid:6);.9*2;(cid:6)6*27=.7*7,.@8;4(cid:6)8; (cid:26)*7-5. 9;8=8=B92702727-><=;2*5(cid:6),866.;,2*5(cid:6)8;27<=2=>=287*5*9952,*=287<(cid:8)!;8->,= ,;269.-@2=1=12<=885@2556..==1.,;2691.201=;.:>2;.6.7=/8;1*7-=885<27 =1.*99;89;2*=.(cid:10)(cid:10)(cid:13)*9952,*=287<9.,2/2,*=287(cid:6)+>=6*B78=,8695B@2=18=1.; /.*=>;.9*;*6.=.;<8/=1.<9.,2/2,*=287(cid:8)$B,8(cid:23)5.,=;872,<8//.;<*?*;2.=B8/ =885<=8<*=2</BB8>;9.;/8;6*7,.;.:>2;.6.7=<(cid:8)(cid:24)8;*--2=287*527/8;6*=287(cid:6) ,87=*,==1.$885270(cid:19)<<2<=*7,.(cid:21).7=.;*=(cid:10)(cid:7)(cid:17)(cid:9)(cid:9)(cid:7)(cid:16)(cid:11)(cid:11)(cid:7)(cid:10)(cid:10)(cid:10)(cid:10)(cid:8) *0’ (cid:30)(cid:18) (cid:30)(cid:18) (cid:16)(cid:16).-2#%2 (cid:22)-13+#2*.- (cid:17)*’(cid:15)11’,$+5 (cid:23).%#2.0(cid:15)11’,$+5(cid:2) (cid:19)#,*+5(cid:3) (cid:29)*6’ (cid:17)*#,’2’0 (cid:29)20*/(cid:23)’-(2) (cid:2),,(cid:9)(cid:3) (cid:2),,!(cid:22)-%)’1"(cid:3) (cid:2),,!(cid:22)-%)’1"(cid:3) #%!(cid:23)"#(cid:23)(cid:19)(cid:29)(cid:5) (cid:10)(cid:8)(cid:16)(cid:9)(cid:7)(cid:11)(cid:8)(cid:13)(cid:9) (cid:12)(cid:8)(cid:9)(cid:9)(cid:7)(cid:12)(cid:8)(cid:14)(cid:9) (cid:14)(cid:17)(cid:14)(cid:17)(cid:12)(cid:7)(cid:11) (cid:14)(cid:17)(cid:14)(cid:10)(cid:14)(cid:7)(cid:10) (cid:9)(cid:8)(cid:14)(cid:7)(cid:10)(cid:8)(cid:14) (cid:10)(cid:8)(cid:14)#.;2.<(cid:21)87=*,=< ((cid:8)(cid:9)(cid:15)(cid:16)(cid:7)(cid:8)(cid:9)(cid:18)(cid:13)) ((cid:8)(cid:10)(cid:10)(cid:17)(cid:7)(cid:8)(cid:10)(cid:12)(cid:17)) (cid:2)#>9952.-@2=1-2.*<<.6+5B(cid:6)*5<8*?*25*+5.<.9*;*=.5B(cid:8) (cid:3)(cid:21)87=*,==1.$885270(cid:19)<<2<=*7,.(cid:21).7=.;8;!;8->,=(cid:27)7/8;6*=287(cid:21).7=.; (cid:3)+.58@(cid:4)/8;<9.,2/2,,87=*,=9*;=7>6+.;<(cid:8) Figure 1 (cid:8)(cid:6) (cid:22)(cid:25)(cid:30)(cid:28)(cid:26)(cid:17)(cid:31)(cid:16)(cid:30)(cid:22)(cid:26)(cid:25) Read these instructions thoroughly before crimping any contacts. PRO–CRIMPER III Hand Crimping Tool Assembly 58583–1 consists of Die Assembly 58583–2 and PRO–CRIMPER III Hand Crimping Tool Frame (cid:25)(cid:26)(cid:30)(cid:18) (cid:3)(cid:15)(cid:18)(cid:11)(cid:19)(cid:24)(cid:15)(cid:20)(cid:19)(cid:24)(cid:20)(cid:19)(cid:25)(cid:14)(cid:15)(cid:24)(cid:24)(cid:14)(cid:11)(cid:11)(cid:25)(cid:7)(cid:23)(cid:11)(cid:15)(cid:19)(cid:18)(cid:15)(cid:17)(cid:17)(cid:15)(cid:18)(cid:11)(cid:25)(cid:11)(cid:23)(cid:24)(cid:5)(cid:28)(cid:15)(cid:25)(cid:14) (cid:15)(cid:19)(cid:9)(cid:14)(cid:11)(cid:22)(cid:26)(cid:15)(cid:27)(cid:7)(cid:17)(cid:11)(cid:19)(cid:25)(cid:24)(cid:21)(cid:23)(cid:20)(cid:27)(cid:15)(cid:10)(cid:11)(cid:10)(cid:15)(cid:19)(cid:8)(cid:23)(cid:7)(cid:9)(cid:16)(cid:11)(cid:25)(cid:24)(cid:6)(cid:2)(cid:4)(cid:15)(cid:13)(cid:26)(cid:23)(cid:11)(cid:24) 354940–1. (cid:1) (cid:7)(cid:19)(cid:10)(cid:15)(cid:17)(cid:17)(cid:26)(cid:24)(cid:25)(cid:23)(cid:7)(cid:25)(cid:15)(cid:20)(cid:19)(cid:24)(cid:7)(cid:23)(cid:11)(cid:12)(cid:20)(cid:23)(cid:15)(cid:10)(cid:11)(cid:19)(cid:25)(cid:15)(cid:12)(cid:15)(cid:9)(cid:7)(cid:25)(cid:15)(cid:20)(cid:19)(cid:20)(cid:19)(cid:17)(cid:29)(cid:7)(cid:19)(cid:10)(cid:7)(cid:23)(cid:11) The die assembly consists of crimping dies and a (cid:19)(cid:20)(cid:25)(cid:10)(cid:23)(cid:7)(cid:28)(cid:19)(cid:25)(cid:20)(cid:24)(cid:9)(cid:7)(cid:17)(cid:11)(cid:2) locator assembly. (cid:1)(cid:11)(cid:9)(cid:9)(cid:18)$B,8(cid:23)5.,=;872,<(cid:21)8;98;*=287(cid:6)(cid:26)*;;2<+>;0(cid:6)!(cid:19) $ (cid:29)(cid:27)(cid:31)(cid:25)(cid:19)##(cid:27)#$(cid:19)(cid:31)(cid:21)(cid:23)(cid:21)(cid:23)(cid:31)$(cid:23)"(cid:10)(cid:7)(cid:17)(cid:9)(cid:9)(cid:7)(cid:16)(cid:11)(cid:11)(cid:7)(cid:10)(cid:10)(cid:10)(cid:10) $12<,87=;855.--8,>6.7=2<<>+3.,==8,1*70.(cid:8) (cid:8)8/(cid:14) (cid:19)55(cid:27)7=.;7*=287*5"201=<".<.;?.- !" (cid:22)%(cid:21)$(cid:27)(cid:31)(cid:24) "(cid:30)(cid:19)$(cid:27) (cid:31)(cid:10)(cid:7)(cid:17)(cid:9)(cid:9)(cid:7)(cid:14)(cid:11)(cid:11)(cid:7)(cid:15)(cid:16)(cid:14)(cid:11) (cid:24)8;5*=.<=;.?2<287*7-".0287*5(cid:21)><=86.;#.;?2,.(cid:6) $(cid:23)5808*7-$B,8(cid:23)5.,=;872,<*;.=;*-.6*;4<(cid:8) ?2<2=8>;@.+<2=.*=444(cid:6)25%.’+’%20.-*%1(cid:6)%., (cid:29) (cid:21)(cid:20) (cid:5)$;*-.6*;4(cid:8) =1.;9;8->,=<(cid:6)5808<(cid:6)*7-,869*7B7*6.<><.-*;.=1.9;89.;=B8/=1.2;;.<9.,=2?.8@7.;<(cid:8)
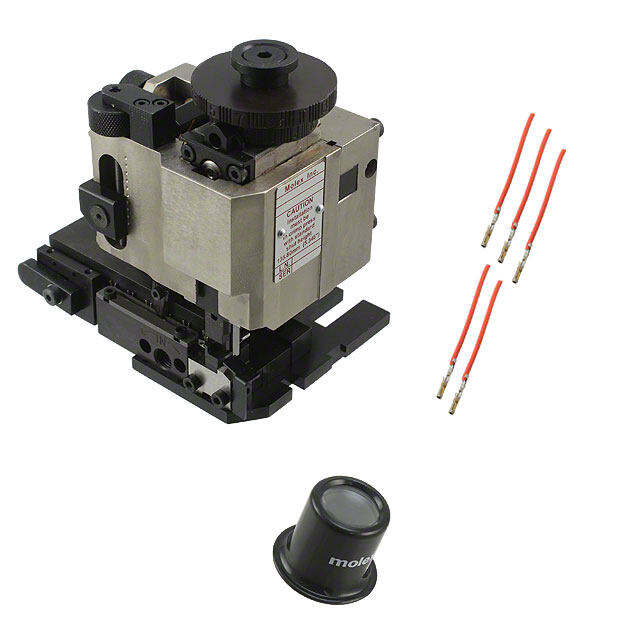
(cid:24)(cid:25)(cid:23)(cid:2)(cid:14)(cid:25)(cid:19)(cid:21)(cid:24)(cid:16)(cid:25)(cid:19)(cid:19)(cid:19)(cid:18)(cid:30)& (cid:14))#%(#&"(cid:27)’’$(cid:12)**!%(cid:31)$+(cid:9)(cid:11)(cid:9)(cid:11)(cid:7)(cid:2)(cid:5) (cid:8)(cid:4)(cid:11)(cid:2)(cid:8)(cid:5)(cid:10)(cid:9) (cid:14)&% (cid:13)!(cid:23)(cid:21)%!# (cid:7)$$(cid:25)(cid:31)(cid:22)(cid:30)) (cid:19)!!(cid:30)(cid:11)#(cid:21)(cid:31)(cid:25) (cid:13)!(cid:23)(cid:21)%!# (cid:9)(cid:29)(cid:25)(cid:17)(cid:25)%(cid:21)(cid:29) (cid:29) (cid:27) (cid:16)(cid:29) $ (cid:12) $&(cid:30)(cid:21)%(cid:29)! (cid:8)#(cid:29)(cid:31)"(cid:25)# (cid:8)(cid:28)(cid:21)(cid:31)(cid:26)(cid:25)# (cid:20)(cid:29)#(cid:25) (cid:8)#(cid:29)(cid:31)"(cid:25)# (cid:15)(cid:26)(cid:26)$(cid:25)% (cid:20)(cid:29)#(cid:25)(cid:7) ’(cid:29)(cid:30) (cid:12) $&(cid:30)(cid:21)%(cid:29)! (cid:7) ’(cid:29)(cid:30) (cid:8)(cid:28)(cid:21)(cid:31)(cid:26)(cid:25)# (cid:9)(cid:29)(cid:25)(cid:17)(cid:25)%(cid:21)(cid:29) (cid:29) (cid:27) (cid:18)(cid:23)#(cid:25)($ Figure 2 (cid:6)(cid:3) (cid:15)(cid:16)(cid:26)(cid:14)(cid:25)(cid:19)(cid:24)(cid:27)(cid:19)(cid:23)(cid:22)(cid:2)(cid:11)(cid:29)(cid:27)&#(cid:25)$(cid:4)(cid:21) (cid:24)(cid:5)(cid:3) 4. Insert the short die retaining screw through the jaw and through both anvil dies, and tighten the The tool features a tool frame with a stationary jaw screw just enough to hold the dies in place. Do not and handle, a moving jaw, a moving handle, and an tighten the screw completely at this time. adjustable ratchet that ensures full contact crimping. 5. Place the wire crimper and insulation crimper so The tool frame holds a die assembly with three that their chamfered sides and their marked crimping chambers. The die assembly features a wire surfaces face outward, when mounted in the anvil, an insulation anvil, a wire crimper, and an stationary jaw of the tool frame. insulation crimper. 6. Insert the two die retaining pins. Attached to the outside of the frame is a locator 7. Insert the long die retaining screw through the assembly, which contains a locator, a spring retainer, jaw and through both crimper dies, and tighten the and a contact support. screw just enough to hold the dies in place. Do not tighten the screw completely at this time. Die retaining pins and die retaining screws are used to position and secure the dies in the tool frame. A 8. Carefully close the tool handles, making sure nut is used on the upper die retaining screw to hold that the anvils and crimpers align properly. the locator assembly in place. Continue closing the tool handles until the ratchet in the tool frame has engaged sufficiently to hold the anvils and crimpers in place, then tighten both (cid:7)(cid:3) (cid:19)(cid:22)(cid:26)(cid:27)(cid:12)(cid:20)(cid:20)(cid:12)(cid:27)(cid:19)(cid:23)(cid:22)(cid:12)(cid:22)(cid:15)(cid:25)(cid:16)(cid:21)(cid:23)(cid:28)(cid:12)(cid:20)(cid:23)(cid:17)(cid:15)(cid:19)(cid:16)(cid:12)(cid:26)(cid:26)(cid:16)(cid:21)(cid:13)(cid:20)(cid:29) die retaining screws. (cid:12)(cid:22)(cid:15)(cid:20)(cid:23)(cid:14)(cid:12)(cid:27)(cid:23)(cid:25)(cid:12)(cid:26)(cid:26)(cid:16)(cid:21)(cid:13)(cid:20)(cid:29)(cid:2)(cid:11)(cid:29)(cid:27)&#(cid:25)(cid:5)(cid:3) 9. Place the locator assembly over the end of the long screw, and position the locator assembly 1. Open the tool handles and remove the two die against the side of the tool jaw. retaining screws from the tool jaws. 10. Place the nut onto the end of the long screw 2. Place the wire anvil and insulation anvil so that and tighten the nut enough to hold the locator their chamfered sides and their marked surfaces assembly in place, while still allowing the locator to face outward, when mounted in the moving jaw of slide up and down. the tool frame. 11. To disassemble, close the tool handles until the 3. Insert the two die retaining pins. ratchet releases, remove the nut, the locator (cid:6)!(cid:26)(cid:6) (cid:19))(cid:23)!(cid:10)(cid:30)(cid:25)(cid:23)%#! (cid:29)(cid:23)$(cid:8)!#"!#(cid:21)%(cid:29)! (cid:17)(cid:25)’(cid:12)
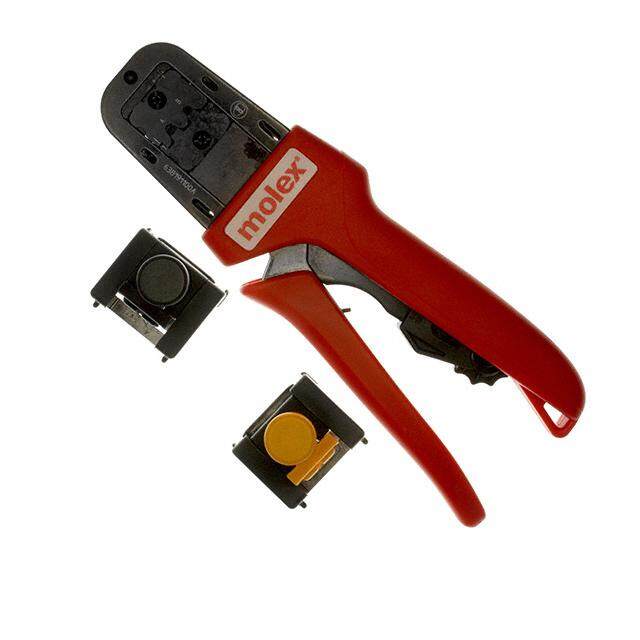
(cid:22)(cid:23)(cid:21)(cid:2)(cid:12)(cid:23)(cid:17)(cid:19)(cid:22)(cid:14)(cid:23)(cid:17)(cid:17)(cid:17)(cid:16)(cid:27)#(cid:29)(cid:12)& "% #(cid:31)(cid:25)$$!(cid:11)’’(cid:30)"(cid:28)!((cid:8)(cid:10)(cid:8)(cid:10)(cid:6)(cid:2)(cid:5) (cid:7)(cid:4)(cid:10)(cid:2)(cid:7)(cid:5)(cid:9)(cid:8) assembly, the two die retaining screws, and the 8. Make another sample crimp. If the contact is four die retaining pins, and slide the anvils and straight, tighten the contact support screw. If the crimpers out of the tool jaws. contact is still being bent during crimping, repeat the adjustment procedure. (cid:7)(cid:3) (cid:12)(cid:21)(cid:20)(cid:25)(cid:11)(cid:12)(cid:25)(cid:24)(cid:26)(cid:22)(cid:22)(cid:21)(cid:23)(cid:25)(cid:11)(cid:13)(cid:18)(cid:26)(cid:24)(cid:25)(cid:19)(cid:14)(cid:20)(cid:25)(cid:2)(cid:10)(cid:24)(cid:22)# (cid:20)(cid:4)(cid:3) (cid:8)(cid:3) (cid:12)(cid:23)(cid:17)(cid:19)(cid:22)(cid:17)(cid:20)(cid:15)(cid:22)(cid:23)(cid:21)(cid:12)(cid:14)(cid:13)(cid:26)(cid:23)(cid:14) (cid:20)(cid:21)(cid:25)(cid:14) (cid:22)(cid:31)(cid:28)(cid:26)&%*(cid:24)(cid:26)*)+’’&(* )’((cid:28))(cid:28)*’( &(*&)(cid:31) ’$(cid:28)%*(cid:2) (cid:20)(cid:21)(cid:25)(cid:14) (cid:22)(cid:31) )*&&# )’(&, (cid:27)(cid:28)(cid:27)- *(cid:31)(cid:24)(cid:26)( $’(cid:24)(cid:27)!+)*$(cid:28)%* (cid:25)+*$ %&((cid:24)(cid:27)!+)*$(cid:28)%*$(cid:24).(cid:25)(cid:28)%(cid:28)(cid:26)(cid:28)))(cid:24)(.(cid:3) (cid:1) (cid:29)(cid:28)(cid:24)*+((cid:28)(cid:3)(cid:14)% * (cid:24)##.(cid:2)*(cid:31)(cid:28)(cid:26)( $’(cid:31)(cid:28) (cid:30)(cid:31)*)(cid:31)&+#(cid:27)(cid:25)(cid:28) (cid:1) ,(cid:28)( (cid:29) (cid:28)(cid:27)(cid:24)))’(cid:28)(cid:26) (cid:29) (cid:28)(cid:27) %(cid:11) (cid:30)+((cid:28)(cid:4)(cid:3)(cid:20)(cid:28)(cid:29)(cid:28)(*& (cid:21)(cid:28)(cid:26)* &%(cid:5)(cid:2)(cid:8)(cid:20)(cid:14)(cid:16)(cid:19)(cid:13)(cid:10)(cid:14)(cid:12)(cid:13)(cid:22)(cid:14)(cid:17)(cid:21)(cid:19)(cid:10)(cid:8)(cid:22)(cid:14)(cid:18)(cid:17)(cid:2)(cid:24)%(cid:27) (cid:21)(cid:28)(cid:26)* &%(cid:6)(cid:2)(cid:8)(cid:20)(cid:14)(cid:16)(cid:19)(cid:13)(cid:10)(cid:14)(cid:12)(cid:13)(cid:22)(cid:7)(cid:9)(cid:15)(cid:23)(cid:21)(cid:22)(cid:16)(cid:10)(cid:17)(cid:22)(cid:2)*& 1. Make a sample crimp and determine if the ,(cid:28)( (cid:29).(cid:26)( $’(cid:31)(cid:28) (cid:30)(cid:31)*(cid:25)(cid:28)(cid:29)&((cid:28)+) %(cid:30)*(cid:31)(cid:28)*&&#*&(cid:26)( $’ contact is straight, bending upward, or bending (cid:27)(cid:28)) ((cid:28)(cid:27)(cid:26)&%*(cid:24)(cid:26)*)(cid:24)%(cid:27)- ((cid:28)) /(cid:28))(cid:3) downward. Refer to the table in Figure 1 and select wire of the 2. If adjustment is required, loosen the screw that specified size and insulation diameter. Assemble holds the contact support onto the locator applicable wire seal onto wire according to the assembly. instructions packaged with the contact. Strip the wire to the length indicated in Figure 1, taking care not to (cid:20)(cid:21)(cid:25)(cid:14) (cid:22)(cid:31)(cid:28)((cid:24)*(cid:26)(cid:31)(cid:28)*(cid:31)(cid:24))(cid:27)(cid:28)*(cid:28)%*)*(cid:31)(cid:24)*(cid:26)((cid:28)(cid:24)*(cid:28)(cid:24)+(cid:27) (cid:25)#(cid:28)(cid:26)# (cid:26)") nick or cut wire strands. Select an applicable contact (cid:24))*(cid:31)(cid:28)*&&#(cid:31)(cid:24)%(cid:27)#(cid:28))(cid:24)((cid:28)(cid:26)#&)(cid:28)(cid:27)(cid:3) (cid:1) and identify the appropriate crimping chamber according to the wire size markings on the tool. Refer to Figure 3 and proceed as follows: 3. Place a contact with wire into the proper nest 1. Hold the tool so that the back (wire side) is and close the tool handles until the ratchet reaches facing you. Squeeze tool handles together and the sixth click, or until the contact support touches allow them to open fully. the contact. 2. Holding the contact by the mating end, insert the 4. Slightly loosen the nut that holds the locator contact—insulation barrel first—through the front of assembly onto the tool frame. the tool and into the appropriate crimping chamber. 3. Position the contact so that the mating end of 5. Move the contact support as required to the contact is on the locator side of the tool, and so eliminate the bending of the contact. that the open “U” of the wire and insulation barrels 6. Tighten the nut and close the handles until the face the top of the tool. Place the contact up into ratchet releases. the nest so that the movable locator drops into the slot in the contact. Refer to Figure 3. Butt the front 7. Remove and inspect the contact. end of the wire barrel against the movable locator. (cid:8)(cid:30)(cid:29)"(cid:17)(cid:18)" (cid:12)(cid:30)(cid:18)(cid:17)"(cid:30) (cid:14)#(cid:31)(cid:31)(cid:30) " (cid:7)(cid:17)(cid:18)(cid:26)(cid:30)(cid:21)(cid:15)(cid:30)(cid:30)(cid:27) (cid:2)(cid:16)(cid:24) (cid:20)(cid:14)(cid:24)(cid:19)(cid:20)(cid:3) (cid:6)(cid:19)(cid:25)#!"(cid:28)(cid:20)(cid:29)" (cid:14)(cid:18) (cid:20)%(cid:21)(cid:30) (cid:8)(cid:30)(cid:29)"(cid:17)(cid:18)" (cid:14)" (cid:24)(cid:31) (cid:8)(cid:30)(cid:29)"(cid:17)(cid:18)" (cid:2)(cid:15)&(cid:31)(cid:3) (cid:12)(cid:20)(cid:29)(cid:22)"(cid:23) (cid:14)#(cid:31)(cid:31)(cid:30) " (cid:16)(cid:24) (cid:20) (cid:16)(cid:24) (cid:20) (cid:12)(cid:30)(cid:18)(cid:17)"(cid:30) (cid:24)(cid:29) (cid:14)(cid:20)(cid:17)(cid:27) (cid:16)(cid:24) (cid:20)(cid:14)"(cid:30)(cid:31)(cid:14)(cid:27)(cid:30)" (cid:16)(cid:24) (cid:20) (cid:16)(cid:24) (cid:20) (cid:11)(cid:29)!(cid:20) "(cid:20)(cid:19) (cid:14)(cid:20)(cid:17)(cid:27) "(cid:30)(cid:14)"(cid:30)(cid:31) Figure 3 (cid:13)(cid:20)$(cid:11) (cid:15)&(cid:18)(cid:30)(cid:9)(cid:27)(cid:20)(cid:18)" (cid:30)(cid:29)(cid:24)(cid:18)!(cid:8)(cid:30) (cid:31)(cid:30) (cid:17)"(cid:24)(cid:30)(cid:29) (cid:6)(cid:30)(cid:21)(cid:5)
(cid:27)(cid:28)(cid:26)(cid:5)(cid:17)(cid:28)(cid:22)(cid:24)(cid:27)(cid:19)(cid:28)(cid:22)(cid:22)(cid:22)(cid:21)!+#(cid:17).’*-’+%(cid:30),,)(cid:16)//$*")1(cid:12)(cid:15)(cid:12)(cid:15)(cid:10)(cid:5)(cid:8) (cid:11)(cid:7)(cid:15)(cid:5)(cid:11)(cid:8)(cid:13)(cid:12) (cid:17)(cid:16)(cid:31)(cid:30)(cid:22)(cid:26)(cid:25) (cid:18)(cid:25)"(cid:29))+((cid:29)* (cid:25)*(cid:26)&* )!(cid:28)(cid:29))&(cid:30)* (cid:29)!%)+#(cid:25)*!&%(cid:26)(cid:25)(((cid:29)# (cid:22)*-$.$*)(cid:22)*$). (cid:25)((cid:29))*(cid:25)(*(cid:29)(cid:28)(cid:29),(cid:29)%#.!%*&* (cid:29)(cid:27)(!$’!%(cid:31)(cid:27) (cid:25)$(cid:26)(cid:29)((cid:6) *)(cid:16) ). ,*! (cid:1) (cid:13)&(cid:19)(cid:20)(cid:24)(cid:25)**(cid:29)$’**&(cid:27)(!$’(cid:25)%!$’(&’(cid:29)(#. (cid:26)$, (cid:15)(cid:29),, ’ ’&)!*!&%(cid:29)(cid:28)(cid:27)&%*(cid:25)(cid:27)*(cid:6) (cid:21)++*-$. (cid:24) (cid:29)( 4. Hold the contact in position and squeeze the tool handles together until ratchet engages sufficiently to hold the contact in position. Do NOT (cid:20)*(cid:31)$!$ (cid:31) 3(cid:14)(cid:2) deform insulation barrel or wire barrel. (cid:14))0$’ (cid:5)(cid:7)(cid:6)(cid:7)(cid:12) (cid:27)(cid:5)(cid:6)(cid:7)(cid:7)(cid:9)(cid:28) 5. Insert stripped wire (with wire seal) into contact insulation and wire barrels until it is butted against the wire stop, as shown in Figure 3. ’.$(cid:29)’2$ (cid:17).’*-’+%(cid:17)&!*"$. (cid:17).’*-(cid:21)$’%&0 (cid:3)**(cid:9)(cid:4) (cid:3) ’.$(cid:29)’2$(cid:24)!.(’+%(cid:4) (cid:18)’*$+/’,+3!(cid:2) 6. Holding the wire in place, squeeze tool handles together until ratchet releases. Allow tool handles (cid:7)(cid:6)(cid:12) (cid:7)(cid:6)(cid:12) (cid:8)(cid:6)(cid:8)(cid:9)(cid:27)(cid:6)(cid:7)(cid:11)(cid:11)(cid:28) to open and remove crimped contact. (cid:8)(cid:6)(cid:7) (cid:8)(cid:6)(cid:7) (cid:8)(cid:6)(cid:10)(cid:7)(cid:27)(cid:6)(cid:7)(cid:12)(cid:8)(cid:28) (cid:25)(cid:26)(cid:30)(cid:19) (cid:24) (cid:29)(cid:27)(!$’(cid:29)(cid:28)(cid:27)&%*(cid:25)(cid:27)*$(cid:25).)*!(cid:27)"!%* (cid:29)(cid:27)(!$’!%(cid:31) (cid:25)((cid:29)(cid:25)(cid:4)(cid:26)+** (cid:29)(cid:27)&%*(cid:25)(cid:27)*(cid:27)(cid:25)%(cid:26)(cid:29)(cid:29)(cid:25))!#.((cid:29)$&,(cid:29)(cid:28)(cid:26). (cid:8)(cid:6)(cid:12) (cid:8)(cid:6)(cid:12) (cid:8)(cid:6)(cid:11)(cid:12)(cid:27)(cid:6)(cid:7)(cid:12)(cid:13)(cid:28) (cid:2) ’+) !%(cid:31)(cid:28)&-%-(cid:25)((cid:28)&%* (cid:29)*&’&(cid:30)* (cid:29)#&(cid:27)(cid:25)*&((cid:2))(cid:29)(cid:29) (cid:15)!(cid:31)+((cid:29)(cid:9)(cid:3)(cid:6) Figure 4 7. Check the contact crimp height as described in Section 6, CRIMP HEIGHT INSPECTION. If 3. Observe the ratchet adjustment wheel. If a necessary, adjust the crimp height as described in tighter crimp is required, rotate the adjustment Section 7, CRIMP HEIGHT ADJUSTMENT. wheel COUNTERCLOCKWISE to a higher–numbered setting. If a looser crimp is required, rotate the adjustment wheel (cid:13)(cid:6) (cid:17)(cid:28)(cid:22)(cid:24)(cid:27)(cid:21)(cid:19)(cid:22)(cid:20)(cid:21)(cid:30)(cid:22)(cid:25)(cid:29)(cid:27)(cid:19)(cid:17)(cid:30)(cid:22)(cid:26)(cid:25) CLOCKWISE to a lower–numbered setting. This inspection requires the use of a micrometer with 4. Replace the lockscrew. a modified anvil. 5. Make a sample crimp and measure the crimp (cid:25)(cid:26)(cid:30)(cid:19) (cid:24).(cid:27)&(cid:14)#(cid:29)(cid:27)*(&%!(cid:27))(cid:28)&(cid:29))%&*$(cid:25)%+(cid:30)(cid:25)(cid:27)*+((cid:29)&($(cid:25)("(cid:29)* height. If the dimension is acceptable, secure the * (cid:29))(cid:29)(cid:31)(cid:25)(cid:31)(cid:29))(cid:6)(cid:16)&-(cid:29),(cid:29)((cid:4)(cid:24)(cid:14)((cid:29)(cid:27)&$$(cid:29)%(cid:28))* (cid:29) lockscrew. If the dimension is unacceptable, (cid:2) $&(cid:28)!(cid:30)!(cid:29)(cid:28)$!(cid:27)(&$(cid:29)*(cid:29)((cid:2)(cid:12)(!$’(cid:16)(cid:29)!(cid:31) *(cid:12)&$’(cid:25)((cid:25)*&( continue to adjust the ratchet, and again measure (cid:22)(cid:23)(cid:5)(cid:8)(cid:7)(cid:8)(cid:11)(cid:5)(cid:10)(cid:17)(cid:21)(cid:3)&(* (cid:29)(cid:28)!(cid:31)!*(cid:25)#(cid:18)!*+*&.& a sample crimp. $!(cid:27)(&$(cid:29)*(cid:29)((cid:6) Proceed as follows: (cid:24)(cid:30), 1(cid:31),$0 , 1. Refer to Figure 4 and select a wire (maximum size) for each crimping chamber listed. 2. Refer to Section 5, CRIMPING PROCEDURE, and crimp the contact(s) accordingly. 3. Using a crimp height comparator, measure the wire barrel crimp height as shown in Figure 4. If the crimp height conforms to that shown in the table, the tool is considered dimensionally correct. If not, the tool must be adjusted. Refer to Section 7, (cid:23)(cid:29).(cid:30)# . CRIMP HEIGHT ADJUSTMENT. (cid:14)(cid:31)%/-.( ). (cid:26)# ’ (cid:14)(cid:6) (cid:28)(cid:16)(cid:30)(cid:17)(cid:21)(cid:19)(cid:30)(cid:3)(cid:17).’*-(cid:21)$’%&0(cid:4)(cid:16)(cid:18)(cid:23)(cid:31)(cid:29)(cid:30)(cid:24)(cid:19)(cid:25)(cid:30)(cid:3)(cid:18)$"/, (cid:12)(cid:4) 1. Remove the lockscrew from the ratchet (cid:19)*(cid:30)&-(cid:30), 1 adjustment wheel. (cid:3)(cid:25)2+(cid:4) 2. With a screwdriver, adjust the ratchet wheel Figure 5 from the locator side of the tool. (cid:11)*!(cid:12) (cid:25)2(cid:30)*(cid:17)’ (cid:30).,*)$(cid:30)-(cid:16)*,+*,(cid:29).$*) (cid:23) 0(cid:16)
(cid:21)(cid:22)(cid:20)(cid:2)(cid:13)(cid:22)(cid:16)(cid:18)(cid:21)(cid:14)(cid:22)(cid:16)(cid:16)(cid:16)(cid:15)(cid:28)$(cid:30)(cid:13)’!#&!$ (cid:24)%%"(cid:12)(((cid:31)#(cid:29)")(cid:8)(cid:10)(cid:8)(cid:10)(cid:6)(cid:2)(cid:5) (cid:7)(cid:4)(cid:10)(cid:2)(cid:7)(cid:5)(cid:9)(cid:8) (cid:10)(cid:3) (cid:18)(cid:12)(cid:16)(cid:19)(cid:24)(cid:14)(cid:19)(cid:12)(cid:19)(cid:13)(cid:14) Order the repair kit and replaceable parts through your Tyco Electronics representative, or call Ensure that the tool and dies are clean by wiping 1–800–526–5142, or send a facsimile of your them with a clean, soft cloth. Remove any debris with purchase order to 1–717–986–7605, or write to: a clean, soft brush. Do not use objects that could damage the tool. When not in use, keep handles CUSTOMER SERVICE (38–35) closed to prevent objects from becoming lodged in TYCO ELECTRONICS the crimping dies, and store in a clean, dry area. PO BOX 3608 HARRISBURG PA 17105–3608 (cid:11)(cid:3) (cid:26)(cid:16)(cid:23)(cid:25)(cid:12)(cid:17)(cid:16)(cid:19)(cid:23)(cid:21)(cid:14)(cid:13)(cid:24)(cid:16)(cid:20)(cid:19) The crimping dies should be inspected on a regular (cid:5)(cid:5)(cid:3)(cid:22)(cid:14)(cid:26)(cid:16)(cid:23)(cid:16)(cid:20)(cid:19)(cid:23)(cid:25)(cid:18)(cid:18)(cid:12)(cid:22)(cid:27) basis to ensure that they have not become worn or damaged. Inspect the crimping chambers for Since the previous release of this instruction sheet: flattened, chipped, worn, or broken areas. If damage (cid:1) or abnormal wear is evident, the tool must be The TE logo was applied; (cid:1) replaced. See Section 10, REPLACEMENT. The PRO–CRIMPER II hand tool became the PRO–CRIMPER III hand tool; and (cid:1) The format was updated to the current (cid:5)(cid:4)(cid:3) (cid:22)(cid:14)(cid:21)(cid:17)(cid:12)(cid:13)(cid:14)(cid:18)(cid:14)(cid:19)(cid:24) corporate requirements. Customer–replaceable parts are shown in Figure 1. Available separately, PRO–CRIMPER III Hand Crimping Tool Repair Kit 679221–1 includes a replacement nut and a variety of pins, rings, screws, and springs. If the dies are damaged or worn excessively, they must be replaced. (cid:5)(cid:9)(cid:19)(cid:12) (cid:6)(cid:20)(cid:8)(cid:14)(cid:4)(cid:12)(cid:9)(cid:8)(cid:18)(cid:16)(cid:14)(cid:13)(cid:11)(cid:8)(cid:17)(cid:3)(cid:14)(cid:16)(cid:15)(cid:14)(cid:16)(cid:7)(cid:18)(cid:11)(cid:14)(cid:13) (cid:8)(cid:14)(cid:10)(cid:2)
Mouser Electronics Authorized Distributor Click to View Pricing, Inventory, Delivery & Lifecycle Information: T E Connectivity: 58583-2 58583-1