ICGOO在线商城 > 传感器,变送器 > 磁性传感器 - 线性,罗盘(IC) > HMC5883L-TR
 Datasheet下载
- 型号: HMC5883L-TR
- 制造商: Honeywell Solid State Electronics
- 库位|库存: xxxx|xxxx
- 要求:
| 数量阶梯 | 香港交货 | 国内含税 |
| +xxxx | $xxxx | ¥xxxx |
查看当月历史价格
查看今年历史价格
HMC5883L-TR产品简介:
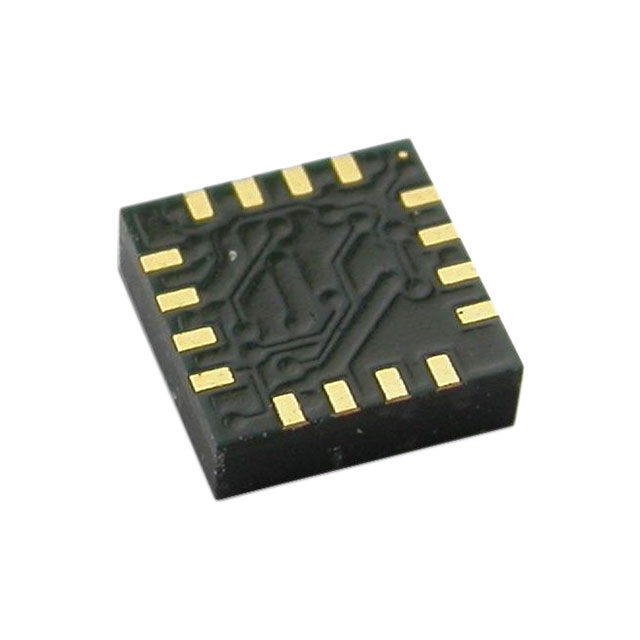
ICGOO电子元器件商城为您提供HMC5883L-TR由Honeywell Solid State Electronics设计生产,在icgoo商城现货销售,并且可以通过原厂、代理商等渠道进行代购。 HMC5883L-TR价格参考。Honeywell Solid State ElectronicsHMC5883L-TR封装/规格:磁性传感器 - 线性,罗盘(IC), Magnetoresistive Sensor X, Y, Z Axis 16-LCC。您可以下载HMC5883L-TR参考资料、Datasheet数据手册功能说明书,资料中有HMC5883L-TR 详细功能的应用电路图电压和使用方法及教程。
Honeywell Aerospace的HMC5883L-TR是一款高精度三轴磁性传感器(电子罗盘IC),广泛应用于需要精确方向检测和导航功能的设备中。其主要应用场景包括:无人机(UAV)飞行控制系统,用于实现航向稳定与自动导航;智能手机和平板电脑中的电子指南针功能,提升地图定位与用户交互体验;可穿戴设备如智能手表和运动手环,用于记录运动方向与步态分析;工业机器人与AGV(自动导引车),提供精准的方向感知以实现自主移动与路径规划;此外,还用于车载导航系统、增强现实(AR)/虚拟现实(VR)设备中的头部或手势追踪,以及消费类电子产品中的姿态检测。HMC5883L-TR具有低功耗、高灵敏度和I²C数字接口,便于集成到紧凑型嵌入式系统中,适合对空间和能耗敏感的应用场景。其良好的温度稳定性和抗干扰能力也使其在复杂电磁环境中保持可靠性能,是中高端消费电子与轻工业领域常用的电子罗盘解决方案。
| 参数 | 数值 |
| 产品目录 | |
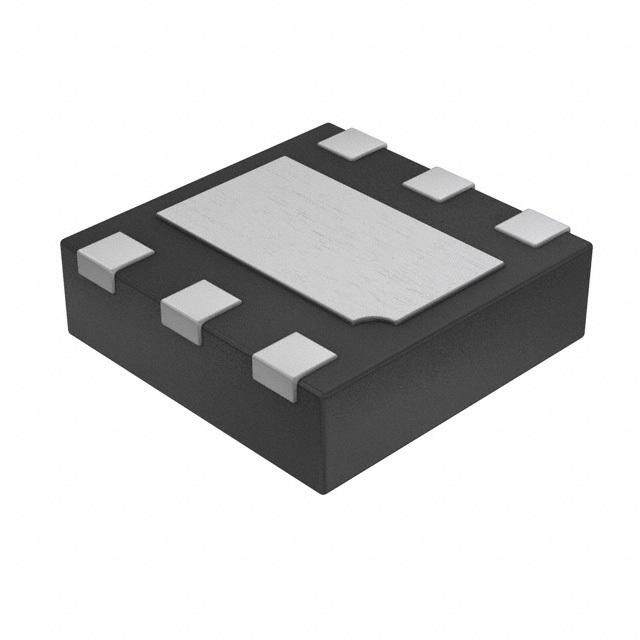
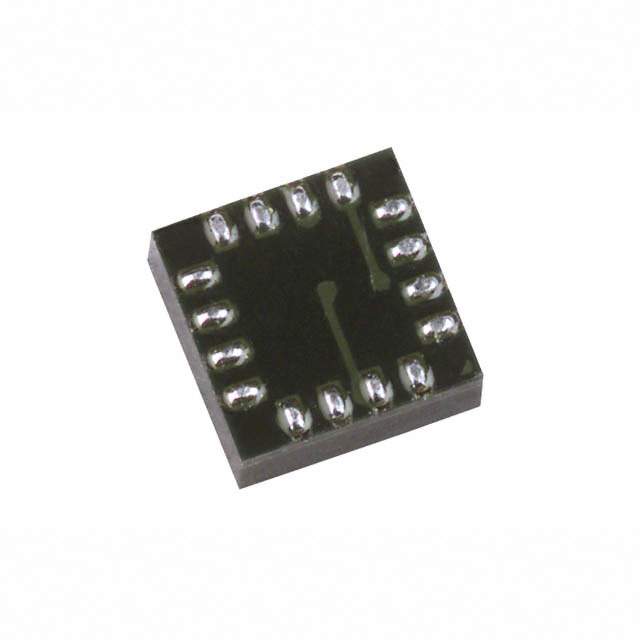
| 描述 | IC COMPASS 3 AXIS I2C 16LCC SMD |
| 产品分类 | 磁性传感器 - 霍尔效应,数字开关,线性,罗盘 (IC) |
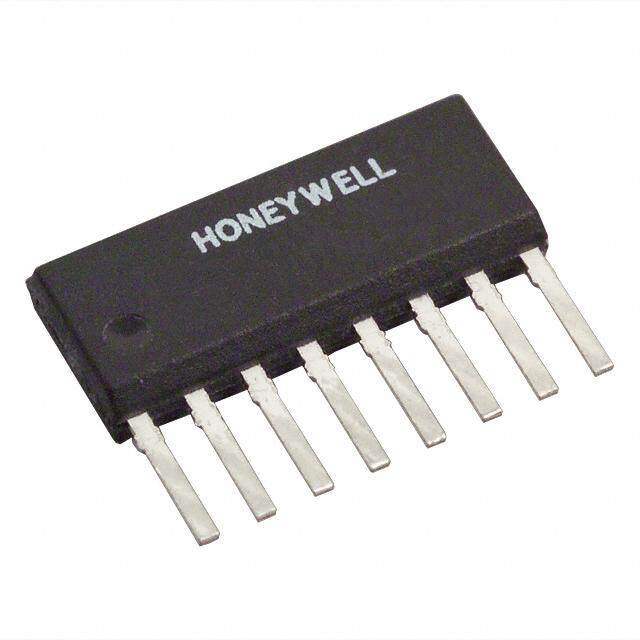
| 品牌 | Honeywell Microelectronics & Precision Sensors |
| 数据手册 | |
| 产品图片 |
|
| 产品型号 | HMC5883L-TR |
| PCN设计/规格 | |
| rohs | 无铅 / 符合限制有害物质指令(RoHS)规范要求 |
| 产品系列 | HMC |
| 产品培训模块 | http://www.digikey.cn/PTM/IndividualPTM.page?site=cn&lang=zhs&ptm=25351 |
| 供应商器件封装 | 16-LCC |
| 其它名称 | 342-1082-6 |
| 包装 | Digi-Reel® |
| 封装/外壳 | 16-LCC |
| 工作温度 | -30°C ~ 85°C |
| 感应范围 | ±8G |
| 标准包装 | 1 |
| 特性 | 罗盘 - 三轴 |
| 电压-电源 | 2.16 V ~ 3.6 V |
| 电流-电源 | 100µA |
| 电流-输出(最大值) | - |
| 类型 | 罗盘 - 三轴 |
| 输出类型 | I²C |
| 配用 | /product-detail/zh/1746/1528-1030-ND/4990779 |


- 商务部:美国ITC正式对集成电路等产品启动337调查
- 曝三星4nm工艺存在良率问题 高通将骁龙8 Gen1或转产台积电
- 太阳诱电将投资9.5亿元在常州建新厂生产MLCC 预计2023年完工
- 英特尔发布欧洲新工厂建设计划 深化IDM 2.0 战略
- 台积电先进制程称霸业界 有大客户加持明年业绩稳了
- 达到5530亿美元!SIA预计今年全球半导体销售额将创下新高
- 英特尔拟将自动驾驶子公司Mobileye上市 估值或超500亿美元
- 三星加码芯片和SET,合并消费电子和移动部门,撤换高东真等 CEO
- 三星电子宣布重大人事变动 还合并消费电子和移动部门
- 海关总署:前11个月进口集成电路产品价值2.52万亿元 增长14.8%


PDF Datasheet 数据手册内容提取
3-Axis Digital Compass IC HMC5883L Advanced Information The Honeywell HMC5883L is a surface-mount, multi-chip module designed for low-field magnetic sensing with a digital interface for applications such as low- cost compassing and magnetometry. The HMC5883L includes our state-of-the- art, high-resolution HMC118X series magneto-resistive sensors plus an ASIC containing amplification, automatic degaussing strap drivers, offset cancellation, and a 12-bit ADC that enables 1° to 2° compass heading accuracy. The I2C serial bus allows for easy interface. The HMC5883L is a 3.0x3.0x0.9mm surface mount 16-pin leadless chip carrier (LCC). Applications for the HMC5883L include Mobile Phones, Netbooks, Consumer Electronics, Auto Navigation Systems, and Personal Navigation Devices. The HMC5883L utilizes Honeywell’s Anisotropic Magnetoresistive (AMR) technology that provides advantages over other magnetic sensor technologies. These anisotropic, directional sensors feature precision in-axis sensitivity and linearity. These sensors’ solid-state construction with very low cross-axis sensitivity is designed to measure both the direction and the magnitude of Earth’s magnetic fields, from milli-gauss to 8 gauss. Honeywell’s Magnetic Sensors are among the most sensitive and reliable low-field sensors in the industry. FEATURES BENEFITS 3-Axis Magnetoresistive Sensors and Small Size for Highly Integrated Products. Just Add a Micro- ASIC in a 3.0x3.0x0.9mm LCC Surface Controller Interface, Plus Two External SMT Capacitors Mount Package Designed for High Volume, Cost Sensitive OEM Designs Easy to Assemble & Compatible with High Speed SMT Assembly 12-Bit ADC Coupled with Low Noise Enables 1° to 2° Degree Compass Heading Accuracy AMR Sensors Achieves 2 milli-gauss Field Resolution in ±8 Gauss Fields Built-In Self Test Enables Low-Cost Functionality Test after Assembly in Production Low Voltage Operations (2.16 to 3.6V) Compatible for Battery Powered Applications and Low Power Consumption (100 μA) Built-In Strap Drive Circuits Set/Reset and Offset Strap Drivers for Degaussing, Self Test, and Offset Compensation I2C Digital Interface Popular Two-Wire Serial Data Interface for Consumer Electronics Lead Free Package Construction RoHS Compliance Wide Magnetic Field Range (+/-8 Oe) Sensors Can Be Used in Strong Magnetic Field Environments with a 1° to 2° Degree Compass Heading Accuracy Software and Algorithm Support Compassing Heading, Hard Iron, Soft Iron, and Auto Calibration Available Libraries Available Fast 160 Hz Maximum Output Rate Enables Pedestrian Navigation and LBS Applications
HMC5883L SPECIFICATIONS (* Tested at 25°C except stated otherwise.) Characteristics Conditions* Min Typ Max Units Power Supply Supply Voltage VDD Referenced to AGND 2.16 2.5 3.6 Volts VDDIO Referenced to DGND 1.71 1.8 VDD+0.1 Volts Average Current Draw Idle Mode - 2 - μA Measurement Mode (7.5 Hz ODR; - 100 - μA No measurement average, MA1:MA0 = 00) VDD = 2.5V, VDDIO = 1.8V (Dual Supply) VDD = VDDIO = 2.5V (Single Supply) Performance Field Range Full scale (FS) -8 +8 gauss Mag Dynamic Range 3-bit gain control ±1 ±8 gauss Sensitivity (Gain) VDD=3.0V, GN=0 to 7, 12-bit ADC 230 1370 LSb/gauss Digital Resolution VDD=3.0V, GN=0 to 7, 1-LSb, 12-bit ADC 0.73 4.35 milli-gauss Noise Floor VDD=3.0V, GN=0, No measurement 2 milli-gauss average, Standard Deviation 100 samples (Field Resolution) (See typical performance graphs below) Linearity ±2.0 gauss input range 0.1 ±% FS Hysteresis ±2.0 gauss input range ±25 ppm Cross-Axis Sensitivity Test Conditions: Cross field = 0.5 gauss, ±0.2% %FS/gauss Happlied = ±3 gauss Output Rate (ODR) Continuous Measurment Mode 0.75 75 Hz Single Measurement Mode 160 Hz Measurement Period From receiving command to data ready 6 ms Turn-on Time Ready for I2C commands 200 μs Analog Circuit Ready for Measurements 50 ms Gain Tolerance All gain/dynamic range settings ±5 % I2C Address 8-bit read address 0x3D hex 8-bit write address 0x3C hex I2C Rate Controlled by I2C Master 400 kHz I2C Hysteresis Hysteresis of Schmitt trigger inputs on SCL and SDA - Fall (VDDIO=1.8V) 0.2*VDDIO Volts Rise (VDDIO=1.8V) 0.8*VDDIO Volts Self Test X & Y Axes ±1.16 gauss Z Axis ±1.08 X & Y & Z Axes (GN=5) Positive Bias 243 575 LSb -575 -243 X & Y & Z Axes (GN=5) Negative Bias Sensitivity Tempco T = -40 to 125°C, Uncompensated Output -0.3 %/°C A General ESD Voltage Human Body Model (all pins) 2000 Volts Charged Device Model (all pins) 750 Operating Temperature Ambient -30 85 °C Storage Temperature Ambient, unbiased -40 125 °C 2 www.honeywell.com
HMC5883L Characteristics Conditions* Min Typ Max Units Reflow Classification MSL 3, 260 C Peak Temperature Package Size Length and Width 2.85 3.00 3.15 mm Package Height 0.8 0.9 1.0 mm Package Weight 18 mg Absolute Maximum Ratings (* Tested at 25°C except stated otherwise.) Characteristics Min Max Units Supply Voltage VDD -0.3 4.8 Volts Supply Voltage VDDIO -0.3 4.8 Volts PIN CONFIGURATIONS Pin Name Description 1 SCL Serial Clock – I2C Master/Slave Clock 2 VDD Power Supply (2.16V to 3.6V) 3 NC Not to be Connected 4 S1 Tie to VDDIO 5 NC Not to be Connected 6 NC Not to be Connected 7 NC Not to be Connected 8 SETP Set/Reset Strap Positive – S/R Capacitor (C2) Connection 9 GND Supply Ground 10 C1 Reservoir Capacitor (C1) Connection 11 GND Supply Ground 12 SETC S/R Capacitor (C2) Connection – Driver Side 13 VDDIO IO Power Supply (1.71V to VDD) 14 NC Not to be Connected Data Ready, Interrupt Pin. Internally pulled high. Optional connection. Low for 250 15 DRDY µsec when data is placed in the data output registers. 16 SDA Serial Data – I2C Master/Slave Data Table 1: Pin Configurations www.honeywell.com 3
HMC5883L Arrow indicates direction of magnetic field that generates a positive output reading in Normal Measurement configuration. PACKAGE OUTLINES PACKAGE DRAWING HMC5883L (16-PIN LPCC, dimensions in millimeters) MOUNTING CONSIDERATIONS The following is the recommend printed circuit board (PCB) footprint for the HMC5883L. 4 www.honeywell.com
HMC5883L 0.450 1.275 1.275 0.300 3.000 0.500x 12 0.100x 8 3.000 HMC5883 Land Pad Pattern (All dimensions are in mm) LAYOUT CONSIDERATIONS Besides keeping all components that may contain ferrous materials (nickel, etc.) away from the sensor on both sides of the PCB, it is also recommended that there is no conducting copper under/near the sensor in any of the PCB layers. See recommended layout below. Notice that the one trace under the sensor in the dual supply mode is not expected to carry active current since it is for pin 4 pull-up to VDDIO. Power and ground planes are removed under the sensor to minimize possible source of magnetic noise. For best results, use non-ferrous materials for all exposed copper coding. www.honeywell.com 5
HMC5883L PCB Pad Definition and Traces The HMC5883L is a fine pitch LCC package. Refer to previous figure for recommended PCB footprint for proper package centering. Size the traces between the HMC5883L and the external capacitors (C1 and C2) to handle the 1 ampere peak current pulses with low voltage drop on the traces. Stencil Design and Solder Paste A 4 mil stencil and 100% paste coverage is recommended for the electrical contact pads. Reflow Assembly This device is classified as MSL 3 with 260C peak reflow temperature. A baking process (125C, 24 hrs) is required if device is not kept continuously in a dry (< 10% RH) environment before assembly. No special reflow profile is required for HMC5883L, which is compatible with lead eutectic and lead-free solder paste reflow profiles. Honeywell recommends adherence to solder paste manufacturer’s guidelines. Hand soldering is not recommended. Built-in self test can be used to verify device functionalities after assembly. External Capacitors The two external capacitors should be ceramic type construction with low ESR characteristics. The exact ESR values are not critical but values less than 200 milli-ohms are recommended. Reservoir capacitor C1 is nominally 4.7 µF in capacitance, with the set/reset capacitor C2 nominally 0.22 µF in capacitance. Low ESR characteristics may not be in many small SMT ceramic capacitors (0402), so be prepared to up-size the capacitors to gain Low ESR characteristics. INTERNAL SCHEMATIC DIAGRAM HMC5883L 6 www.honeywell.com
HMC5883L DUAL SUPPLY REFERENCE DESIGN SINGLE SUPPLY REFERENCE DESIGN www.honeywell.com 7
HMC5883L PERFORMANCE The following graph(s) highlight HMC5883L’s performance. Typical Noise Floor (Field Resolution) HMC5883L Resolution 3 gs din 2.5 a e 0 R 2 0 Dev 1Ga) 1.5 EExx12pp AAoovvnngg.. ((12)) Std (m 1 Ex4p Aovng. (4) n - 0.5 Ex8pAovng. (8) o uti 0 ol es 0 1 2 3 4 5 6 7 R Gain Typical Measurement Period in Single-Measurement Mode * Monitoring of the DRDY Interrupt pin is only required if maximum output rate is desired. 8 www.honeywell.com
HMC5883L BASIC DEVICE OPERATION Anisotropic Magneto-Resistive Sensors The Honeywell HMC5883L magnetoresistive sensor circuit is a trio of sensors and application specific support circuits to measure magnetic fields. With power supply applied, the sensor converts any incident magnetic field in the sensitive axis directions to a differential voltage output. The magnetoresistive sensors are made of a nickel-iron (Permalloy) thin-film and patterned as a resistive strip element. In the presence of a magnetic field, a change in the bridge resistive elements causes a corresponding change in voltage across the bridge outputs. These resistive elements are aligned together to have a common sensitive axis (indicated by arrows in the pinout diagram) that will provide positive voltage change with magnetic fields increasing in the sensitive direction. Because the output is only proportional to the magnetic field component along its axis, additional sensor bridges are placed at orthogonal directions to permit accurate measurement of magnetic field in any orientation. Self Test To check the HMC5883L for proper operation, a self test feature in incorporated in which the sensor is internally excited with a nominal magnetic field (in either positive or negative bias configuration). This field is then measured and reported. This function is enabled and the polarity is set by bits MS[n] in the configuration register A. An internal current source generates DC current (about 10 mA) from the VDD supply. This DC current is applied to the offset straps of the magneto- resistive sensor, which creates an artificial magnetic field bias on the sensor. The difference of this measurement and the measurement of the ambient field will be put in the data output register for each of the three axes. By using this built-in function, the manufacturer can quickly verify the sensor’s full functionality after the assembly without additional test setup. The self test results can also be used to estimate/compensate the sensor’s sensitivity drift due to temperature. For each “self test measurement”, the ASIC: 1. Sends a “Set” pulse 2. Takes one measurement (M1) 3. Sends the (~10 mA) offset current to generate the (~1.1 Gauss) offset field and takes another measurement (M2) 4. Puts the difference of the two measurements in sensor’s data output register: Output = [M2 – M1] (i.e. output = offset field only) See SELF TEST OPERATION section later in this datasheet for additional details. Power Management This device has two different domains of power supply. The first one is VDD that is the power supply for internal operations and the second one is VDDIO that is dedicated to IO interface. It is possible to work with VDDIO equal to VDD; Single Supply mode, or with VDDIO lower than VDD allowing HMC5883L to be compatible with other devices on board. I2C Interface Control of this device is carried out via the I2C bus. This device will be connected to this bus as a slave device under the control of a master device, such as the processor. This device is compliant with I2C-Bus Specification, document number: 9398 393 40011. As an I2C compatible device, this device has a 7-bit serial address and supports I2C protocols. This device supports standard and fast modes, 100kHz and 400kHz, respectively, but does not support the high speed mode (Hs). External pull-up resistors are required to support these standard and fast speed modes. Activities required by the master (register read and write) have priority over internal activities, such as the measurement. The purpose of this priority is to not keep the master waiting and the I2C bus engaged for longer than necessary. Internal Clock The device has an internal clock for internal digital logic functions and timing management. This clock is not available to external usage. www.honeywell.com 9
HMC5883L H-Bridge for Set/Reset Strap Drive The ASIC contains large switching FETs capable of delivering a large but brief pulse to the Set/Reset strap of the sensor. This strap is largely a resistive load. There is no need for an external Set/Reset circuit. The controlling of the Set/Reset function is done automatically by the ASIC for each measurement. One half of the difference from the measurements taken after a set pulse and after a reset pulse will be put in the data output register for each of the three axes. By doing so, the sensor’s internal offset and its temperature dependence is removed/cancelled for all measurements. The set/reset pulses also effectively remove the past magnetic history (magnetism) in the sensor, if any. For each “measurement”, the ASIC: 1. Sends a “Set” pulse 2. Takes one measurement (Mset) 3. Sends a “Reset” pulse 4. Takes another measurement (Mreset) 5. Puts the following result in sensor’s data output register: Output = [Mset – Mreset] / 2 Charge Current Limit The current that reservoir capacitor (C1) can draw when charging is limited for both single supply and dual supply configurations. This prevents drawing down the supply voltage (VDD). MODES OF OPERATION This device has several operating modes whose primary purpose is power management and is controlled by the Mode Register. This section describes these modes. Continuous-Measurement Mode During continuous-measurement mode, the device continuously makes measurements, at user selectable rate, and places measured data in data output registers. Data can be re-read from the data output registers if necessary; however, if the master does not ensure that the data register is accessed before the completion of the next measurement, the data output registers are updated with the new measurement. To conserve current between measurements, the device is placed in a state similar to idle mode, but the Mode Register is not changed to Idle Mode. That is, MD[n] bits are unchanged. Settings in the Configuration Register A affect the data output rate (bits DO[n]), the measurement configuration (bits MS[n]), when in continuous-measurement mode. All registers maintain values while in continuous- measurement mode. The I2C bus is enabled for use by other devices on the network in while continuous-measurement mode. Single-Measurement Mode This is the default power-up mode. During single-measurement mode, the device makes a single measurement and places the measured data in data output registers. After the measurement is complete and output data registers are updated, the device is placed in idle mode, and the Mode Register is changed to idle mode by setting MD[n] bits. Settings in the configuration register affect the measurement configuration (bits MS[n])when in single-measurement mode. All registers maintain values while in single-measurement mode. The I2C bus is enabled for use by other devices on the network while in single-measurement mode. Idle Mode During this mode the device is accessible through the I2C bus, but major sources of power consumption are disabled, such as, but not limited to, the ADC, the amplifier, and the sensor bias current. All registers maintain values while in idle mode. The I2C bus is enabled for use by other devices on the network while in idle mode. 10 www.honeywell.com
HMC5883L REGISTERS This device is controlled and configured via a number of on-chip registers, which are described in this section. In the following descriptions, set implies a logic 1, and reset or clear implies a logic 0, unless stated otherwise. Register List The table below lists the registers and their access. All address locations are 8 bits. Address Location Name Access 00 Configuration Register A Read/Write 01 Configuration Register B Read/Write 02 Mode Register Read/Write 03 Data Output X MSB Register Read 04 Data Output X LSB Register Read 05 Data Output Z MSB Register Read 06 Data Output Z LSB Register Read 07 Data Output Y MSB Register Read 08 Data Output Y LSB Register Read 09 Status Register Read 10 Identification Register A Read 11 Identification Register B Read 12 Identification Register C Read Table2: Register List Register Access This section describes the process of reading from and writing to this device. The devices uses an address pointer to indicate which register location is to be read from or written to. These pointer locations are sent from the master to this slave device and succeed the 7-bit address (0x1E) plus 1 bit read/write identifier, i.e. 0x3D for read and 0x3C for write. To minimize the communication between the master and this device, the address pointer updated automatically without master intervention. The register pointer will be incremented by 1 automatically after the current register has been read successfully. The address pointer value itself cannot be read via the I2C bus. Any attempt to read an invalid address location returns 0’s, and any write to an invalid address location or an undefined bit within a valid address location is ignored by this device. To move the address pointer to a random register location, first issue a “write” to that register location with no data byte following the commend. For example, to move the address pointer to register 10, send 0x3C 0x0A. www.honeywell.com 11
HMC5883L Configuration Register A The configuration register is used to configure the device for setting the data output rate and measurement configuration. CRA0 through CRA7 indicate bit locations, with CRA denoting the bits that are in the configuration register. CRA7 denotes the first bit of the data stream. The number in parenthesis indicates the default value of that bit.CRA default is 0x10. CRA7 CRA6 CRA5 CRA4 CRA3 CRA2 CRA1 CRA0 (0) MA1(0) MA0(0) DO2 (1) DO1 (0) DO0 (0) MS1 (0) MS0 (0) Table 3: Configuration Register A Location Name Description Bit CRA7 is reserved for future function. Set to 0 when CRA7 CRA7 configuring CRA. Select number of samples averaged (1 to 8) per CRA6 to CRA5 MA1 to MA0 measurement output. 00 = 1(Default); 01 = 2; 10 = 4; 11 = 8 Data Output Rate Bits. These bits set the rate at which data CRA4 to CRA2 DO2 to DO0 is written to all three data output registers. Measurement Configuration Bits. These bits define the CRA1 to CRA0 MS1 to MS0 measurement flow of the device, specifically whether or not to incorporate an applied bias into the measurement. Table 4: Configuration Register A Bit Designations The Table below shows all selectable output rates in continuous measurement mode. All three channels shall be measured within a given output rate. Other output rates with maximum rate of 160 Hz can be achieved by monitoring DRDY interrupt pin in single measurement mode. DO2 DO1 DO0 Typical Data Output Rate (Hz) 0 0 0 0.75 0 0 1 1.5 0 1 0 3 0 1 1 7.5 1 0 0 15 (Default) 1 0 1 30 1 1 0 75 1 1 1 Reserved Table 5: Data Output Rates MS1 MS0 Measurement Mode Normal measurement configuration (Default). In normal measurement 0 0 configuration the device follows normal measurement flow. The positive and negative pins of the resistive load are left floating and high impedance. Positive bias configuration for X, Y, and Z axes. In this configuration, a positive 0 1 current is forced across the resistive load for all three axes. Negative bias configuration for X, Y and Z axes. In this configuration, a negative 1 0 current is forced across the resistive load for all three axes.. 1 1 This configuration is reserved. Table 6: Measurement Modes 12 www.honeywell.com
HMC5883L Configuration Register B The configuration register B for setting the device gain. CRB0 through CRB7 indicate bit locations, with CRB denoting the bits that are in the configuration register. CRB7 denotes the first bit of the data stream. The number in parenthesis indicates the default value of that bit. CRB default is 0x20. CRB7 CRB6 CRB5 CRB4 CRB3 CRB2 CRB1 CRB0 GN2 (0) GN1 (0) GN0 (1) (0) (0) (0) (0) (0) Table 7: Configuration B Register Location Name Description Gain Configuration Bits. These bits configure the gain for CRB7 to CRB5 GN2 to GN0 the device. The gain configuration is common for all channels. CRB4 to CRB0 0 These bits must be cleared for correct operation. Table 8: Configuration Register B Bit Designations The table below shows nominal gain settings. Use the “Gain” column to convert counts to Gauss. The “Digital Resolution” column is the theoretical value in term of milli-Gauss per count (LSb) which is the inverse of the values in the “Gain” column. The effective resolution of the usable signal also depends on the noise floor of the system, i.e. Effective Resolution = Max (Digital Resolution, Noise Floor) Choose a lower gain value (higher GN#) when total field strength causes overflow in one of the data output registers (saturation). Note that the very first measurement after a gain change maintains the same gain as the previous setting. The new gain setting is effective from the second measurement and on. Recommended Gain Digital GN2 GN1 GN0 Sensor Field (LSb/ Resolution Output Range Range Gauss) (mG/LSb) 0xF800–0x07FF 0 0 0 ± 0.88 Ga 1370 0.73 (-2048–2047 ) 0xF800–0x07FF 0 0 1 ± 1.3 Ga 1090 (default) 0.92 (-2048–2047 ) 0xF800–0x07FF 0 1 0 ± 1.9 Ga 820 1.22 (-2048–2047 ) 0xF800–0x07FF 0 1 1 ± 2.5 Ga 660 1.52 (-2048–2047 ) 0xF800–0x07FF 1 0 0 ± 4.0 Ga 440 2.27 (-2048–2047 ) 0xF800–0x07FF 1 0 1 ± 4.7 Ga 390 2.56 (-2048–2047 ) 0xF800–0x07FF 1 1 0 ± 5.6 Ga 330 3.03 (-2048–2047 ) 0xF800–0x07FF 1 1 1 ± 8.1 Ga 230 4.35 (-2048–2047 ) Table 9: Gain Settings www.honeywell.com 13
HMC5883L Mode Register The mode register is an 8-bit register from which data can be read or to which data can be written. This register is used to select the operating mode of the device. MR0 through MR7 indicate bit locations, with MR denoting the bits that are in the mode register. MR7 denotes the first bit of the data stream. The number in parenthesis indicates the default value of that bit. Mode register default is 0x01. MR7 MR6 MR5 MR4 MR3 MR2 MR1 MR0 HS(0) (0) (0) (0) (0) (0) MD1 (0) MD0 (1) Table 10: Mode Register Location Name Description MR7 to Set this pin to enable High Speed I2C, 3400kHz. HS MR2 MR1 to MD1 to Mode Select Bits. These bits select the operation mode of MR0 MD0 this device. Table 11: Mode Register Bit Designations MD1 MD0 Operating Mode Continuous-Measurement Mode. In continuous-measurement mode, the device continuously performs measurements and places the result in the data register. RDY goes high when new data is placed in all three registers. After a power-on or a write to the mode or 0 0 configuration register, the first measurement set is available from all three data output registers after a period of 2/f and subsequent DO measurements are available at a frequency of f , where f is the DO DO frequency of data output. Single-Measurement Mode (Default). When single-measurement mode is selected, device performs a single measurement, sets RDY high and returned to idle mode. Mode register returns to idle mode 0 1 bit values. The measurement remains in the data output register and RDY remains high until the data output register is read or another measurement is performed. 1 0 Idle Mode. Device is placed in idle mode. 1 1 Idle Mode. Device is placed in idle mode. Table 12: Operating Modes 14 www.honeywell.com
HMC5883L Data Output X Registers A and B The data output X registers are two 8-bit registers, data output register A and data output register B. These registers store the measurement result from channel X. Data output X register A contains the MSB from the measurement result, and data output X register B contains the LSB from the measurement result. The value stored in these two registers is a 16-bit value in 2’s complement form, whose range is 0xF800 to 0x07FF. DXRA0 through DXRA7 and DXRB0 through DXRB7 indicate bit locations, with DXRA and DXRB denoting the bits that are in the data output X registers. DXRA7 and DXRB7 denote the first bit of the data stream. The number in parenthesis indicates the default value of that bit. In the event the ADC reading overflows or underflows for the given channel, or if there is a math overflow during the bias measurement, this data register will contain the value -4096. This register value will clear when after the next valid measurement is made. DXRA7 DXRA6 DXRA5 DXRA4 DXRA3 DXRA2 DXRA1 DXRA0 (0) (0) (0) (0) (0) (0) (0) (0) DXRB7 DXRB6 DXRB5 DXRB4 DXRB3 DXRB2 DXRB1 DXRB0 (0) (0) (0) (0) (0) (0) (0) (0) Table 13: Data Output X Registers A and B Data Output Y Registers A and B The data output Y registers are two 8-bit registers, data output register A and data output register B. These registers store the measurement result from channel Y. Data output Y register A contains the MSB from the measurement result, and data output Y register B contains the LSB from the measurement result. The value stored in these two registers is a 16-bit value in 2’s complement form, whose range is 0xF800 to 0x07FF. DYRA0 through DYRA7 and DYRB0 through DYRB7 indicate bit locations, with DYRA and DYRB denoting the bits that are in the data output Y registers. DYRA7 and DYRB7 denote the first bit of the data stream. The number in parenthesis indicates the default value of that bit. In the event the ADC reading overflows or underflows for the given channel, or if there is a math overflow during the bias measurement, this data register will contain the value -4096. This register value will clear when after the next valid measurement is made. DYRA7 DYRA6 DYRA5 DYRA4 DYRA3 DYRA2 DYRA1 DYRA0 (0) (0) (0) (0) (0) (0) (0) (0) DYRB7 DYRB6 DYRB5 DYRB4 DYRB3 DYRB2 DYRB1 DYRB0 (0) (0) (0) (0) (0) (0) (0) (0) Table 14: Data Output Y Registers A and B Data Output Z Registers A and B The data output Z registers are two 8-bit registers, data output register A and data output register B. These registers store the measurement result from channel Z. Data output Z register A contains the MSB from the measurement result, and data output Z register B contains the LSB from the measurement result. The value stored in these two registers is a 16-bit value in 2’s complement form, whose range is 0xF800 to 0x07FF. DZRA0 through DZRA7 and DZRB0 through DZRB7 indicate bit locations, with DZRA and DZRB denoting the bits that are in the data output Z registers. DZRA7 and DZRB7 denote the first bit of the data stream. The number in parenthesis indicates the default value of that bit. In the event the ADC reading overflows or underflows for the given channel, or if there is a math overflow during the bias measurement, this data register will contain the value -4096. This register value will clear when after the next valid measurement is made. www.honeywell.com 15
HMC5883L DZRA7 DZRA6 DZRA5 DZRA4 DZRA3 DZRA2 DZRA1 DZRA0 (0) (0) (0) (0) (0) (0) (0) (0) DZRB7 DZRB6 DZRB5 DZRB4 DZRB3 DZRB2 DZRB1 DZRB0 (0) (0) (0) (0) (0) (0) (0) (0) Table 15: Data Output Z Registers A and B Data Output Register Operation When one or more of the output registers are read, new data cannot be placed in any of the output data registers until all six data output registers are read. This requirement also impacts DRDY and RDY, which cannot be cleared until new data is placed in all the output registers. Status Register The status register is an 8-bit read-only register. This register is used to indicate device status. SR0 through SR7 indicate bit locations, with SR denoting the bits that are in the status register. SR7 denotes the first bit of the data stream. SR7 SR6 SR5 SR4 SR3 SR2 SR1 SR0 (0) (0) (0) (0) (0) (0) LOCK (0) RDY(0) Table 16: Status Register Location Name Description SR7 to 0 These bits are reserved. SR2 Data output register lock. This bit is set when: 1.some but not all for of the six data output registers have been read, 2. Mode register has been read. When this bit is set, the six data output registers are locked SR1 LOCK and any new data will not be placed in these register until one of these conditions are met: 1.all six bytes have been read, 2. the mode register is changed, 3. the measurement configuration (CRA) is changed, 4. power is reset. Ready Bit. Set when data is written to all six data registers. Cleared when device initiates a write to the data output registers and after one or more of the data output registers SR0 RDY are written to. When RDY bit is clear it shall remain cleared for a 250 μs. DRDY pin can be used as an alternative to the status register for monitoring the device for measurement data. Table 17: Status Register Bit Designations 16 www.honeywell.com
HMC5883L Identification Register A The identification register A is used to identify the device. IRA0 through IRA7 indicate bit locations, with IRA denoting the bits that are in the identification register A. IRA7 denotes the first bit of the data stream. The number in parenthesis indicates the default value of that bit. The identification value for this device is stored in this register. This is a read-only register. Register values. ASCII value H IRA7 IRA6 IRA5 IRA4 IRA3 IRA2 IRA1 IRA0 0 1 0 0 1 0 0 0 Table 18: Identification Register A Default Values Identification Register B The identification register B is used to identify the device. IRB0 through IRB7 indicate bit locations, with IRB denoting the bits that are in the identification register A. IRB7 denotes the first bit of the data stream. Register values. ASCII value 4 IRB7 IRB6 IRB5 IRB4 IRB3 IRB2 IRB1 IRB0 0 0 1 1 0 1 0 0 Table 19: Identification Register B Default Values Identification Register C The identification register C is used to identify the device. IRC0 through IRC7 indicate bit locations, with IRC denoting the bits that are in the identification register A. IRC7 denotes the first bit of the data stream. Register values. ASCII value 3 IRC7 IRC6 IRC5 IRC4 IRC3 IRC2 IRC1 IRC0 0 0 1 1 0 0 1 1 Table 20: Identification Register C Default Values I2C COMMUNICATION PROTOCOL The HMC5883L communicates via a two-wire I2C bus system as a slave device. The HMC5883L uses a simple protocol with the interface protocol defined by the I2C bus specification, and by this document. The data rate is at the standard- mode 100kbps or 400kbps rates as defined in the I2C Bus Specifications. The bus bit format is an 8-bit Data/Address send and a 1-bit acknowledge bit. The format of the data bytes (payload) shall be case sensitive ASCII characters or binary data to the HMC5883L slave, and binary data returned. Negative binary values will be in two’s complement form. The default (factory) HMC5883L 8-bit slave address is 0x3C for write operations, or 0x3D for read operations. The HMC5883L Serial Clock (SCL) and Serial Data (SDA) lines require resistive pull-ups (Rp) between the master device (usually a host microprocessor) and the HMC5883L. Pull-up resistance values of about 2.2K to 10K ohms are recommended with a nominal VDDIO voltage. Other resistor values may be used as defined in the I2C Bus Specifications that can be tied to VDDIO. The SCL and SDA lines in this bus specification may be connected to multiple devices. The bus can be a single master to multiple slaves, or it can be a multiple master configuration. All data transfers are initiated by the master device, which is responsible for generating the clock signal, and the data transfers are 8 bit long. All devices are addressed by I2C’s unique 7-bit address. After each 8-bit transfer, the master device generates a 9th clock pulse, and releases the SDA line. The receiving device (addressed slave) will pull the SDA line low to acknowledge (ACK) the successful transfer or leave the SDA high to negative acknowledge (NACK). www.honeywell.com 17
HMC5883L Per the I2C spec, all transitions in the SDA line must occur when SCL is low. This requirement leads to two unique conditions on the bus associated with the SDA transitions when SCL is high. Master device pulling the SDA line low while the SCL line is high indicates the Start (S) condition, and the Stop (P) condition is when the SDA line is pulled high while the SCL line is high. The I2C protocol also allows for the Restart condition in which the master device issues a second start condition without issuing a stop. All bus transactions begin with the master device issuing the start sequence followed by the slave address byte. The address byte contains the slave address; the upper 7 bits (bits7-1), and the Least Significant bit (LSb). The LSb of the address byte designates if the operation is a read (LSb=1) or a write (LSb=0). At the 9th clock pulse, the receiving slave device will issue the ACK (or NACK). Following these bus events, the master will send data bytes for a write operation, or the slave will clock out data with a read operation. All bus transactions are terminated with the master issuing a stop sequence. I2C bus control can be implemented with either hardware logic or in software. Typical hardware designs will release the SDA and SCL lines as appropriate to allow the slave device to manipulate these lines. In a software implementation, care must be taken to perform these tasks in code. OPERATIONAL EXAMPLES The HMC5883L has a fairly quick stabilization time from no voltage to stable and ready for data retrieval. The nominal 56 milli-seconds with the factory default single measurement mode means that the six bytes of magnetic data registers (DXRA, DXRB, DZRA, DZRB, DYRA, and DYRB) are filled with a valid first measurement. To change the measurement mode to continuous measurement mode, after the power-up time send the three bytes: 0x3C 0x02 0x00 This writes the 00 into the second register or mode register to switch from single to continuous measurement mode setting. With the data rate at the factory default of 15Hz updates, a 67 milli-second typical delay should be allowed by the I2C master before querying the HMC5883L data registers for new measurements. To clock out the new data, send: 0x3D, and clock out DXRA, DXRB, DZRA, DZRB, DYRA, and DYRB located in registers 3 through 8. The HMC5883L will automatically re-point back to register 3 for the next 0x3D query. All six data registers must be read properly before new data can be placed in any of these data registers. Below is an example of a (power-on) initialization process for “continuous-measurement mode”: 1. Write CRA (00) – send 0x3C 0x00 0x70 (8-average, 15 Hz default, normal measurement) 2. Write CRB (01) – send 0x3C 0x01 0xA0 (Gain=5, or any other desired gain) 3. Write Mode (02) – send 0x3C 0x02 0x00 (Continuous-measurement mode) 4. Wait 6 ms or monitor status register or DRDY hardware interrupt pin 5. Loop Send 0x3D 0x06 (Read all 6 bytes. If gain is changed then this data set is using previous gain) Convert three 16-bit 2’s compliment hex values to decimal values and assign to X, Z, Y, respectively. Send 0x3C 0x03 (point to first data register 03) Wait about 67 ms (if 15 Hz rate) or monitor status register or DRDY hardware interrupt pin End_loop Below is an example of a (power-on) initialization process for “single-measurement mode”: 1. Write CRA (00) – send 0x3C 0x00 0x70 (8-average, 15 Hz default or any other rate, normal measurement) 2. Write CRB (01) – send 0x3C 0x01 0xA0 (Gain=5, or any other desired gain) 3. For each measurement query: Write Mode (02) – send 0x3C 0x02 0x01 (Single-measurement mode) Wait 6 ms or monitor status register or DRDY hardware interrupt pin Send 0x3D 0x06 (Read all 6 bytes. If gain is changed then this data set is using previous gain) Convert three 16-bit 2’s compliment hex values to decimal values and assign to X, Z, Y, respectively. 18 www.honeywell.com
HMC5883L SELF TEST OPERATION To check the HMC5883L for proper operation, a self test feature in incorporated in which the sensor offset straps are excited to create a nominal field strength (bias field) to be measured. To implement self test, the least significant bits (MS1 and MS0) of configuration register A are changed from 00 to 01 (positive bias) or 10 (negetive bias). Then, by placing the mode register into single or continuous-measurement mode, two data acquisition cycles will be made on each magnetic vector. The first acquisition will be a set pulse followed shortly by measurement data of the external field. The second acquisition will have the offset strap excited (about 10 mA) in the positive bias mode for X, Y, and Z axes to create about a 1.1 gauss self test field plus the external field. The first acquisition values will be subtracted from the second acquisition, and the net measurement will be placed into the data output registers. Since self test adds ~1.1 Gauss additional field to the existing field strength, using a reduced gain setting prevents sensor from being saturated and data registers overflowed. For example, if the configuration register B is set to 0xA0 (Gain=5), values around +452 LSb (1.16 Ga * 390 LSb/Ga) will be placed in the X and Y data output registers and around +421 (1.08 Ga * 390 LSb/Ga) will be placed in Z data output register. To leave the self test mode, change MS1 and MS0 bit of the configuration register A back to 00 (Normal Measurement Mode). Acceptable limits of the self test values depend on the gain setting. Limits for Gain=5 is provided in the specification table. Below is an example of a “positive self test” process using continuous-measurement mode: 1. Write CRA (00) – send 0x3C 0x00 0x71 (8-average, 15 Hz default, positive self test measurement) 2. Write CRB (01) – send 0x3C 0x01 0xA0 (Gain=5) 3. Write Mode (02) – send 0x3C 0x02 0x00 (Continuous-measurement mode) 4. Wait 6 ms or monitor status register or DRDY hardware interrupt pin 5. Loop Send 0x3D 0x06 (Read all 6 bytes. If gain is changed then this data set is using previous gain) Convert three 16-bit 2’s compliment hex values to decimal values and assign to X, Z, Y, respectively. Send 0x3C 0x03 (point to first data register 03) Wait about 67 ms (if 15 Hz rate) or monitor status register or DRDY hardware interrupt pin End_loop 6. Check limits – If all 3 axes (X, Y, and Z) are within reasonable limits (243 to 575 for Gain=5, adjust these limits basing on the gain setting used. See an example below.) Then All 3 axes pass positive self test Write CRA (00) – send 0x3C 0x00 0x70 (Exit self test mode and this procedure) Else If Gain<7 Write CRB (01) – send 0x3C 0x01 0x_0 (Increase gain setting and retry, skip the next data set) Else At least one axis did not pass positive self test Write CRA (00) – send 0x3C 0x00 0x70 (Exit self test mode and this procedure) End If Below is an example of how to adjust the “positive self” test limits basing on the gain setting: 1. If Gain = 6, self test limits are: Low Limit = 243 * 330/390 = 206 High Limit = 575 * 330/390 = 487 2. If Gain = 7, self test limits are: Low Limit = 243 * 230/390 = 143 High Limit = 575 * 230/390 = 339 www.honeywell.com 19
HMC5883L SCALE FACTOR TEMPERATURE COMPENSATION The built-in self test can also be used to periodically compensate the scaling errors due to temperature variations. A compensation factor can be found by comparing the self test outputs with the ones obtained at a known temperature. For example, if the self test output is 400 at room temperature and 300 at the current temperature then a compensation factor of (400/300) should be applied to all current magnetic readings. A temperature sensor is not required using this method. Below is an example of a temperature compensation process using positive self test method: 1. If self test measurement at a temperature “when the last magnetic calibration was done”: X_STP = 400 Y_STP = 410 Z_STP = 420 2. If self test measurement at a different tmperature: X_STP = 300 (Lower than before) Y_STP = 310 (Lower than before) Z_STP = 320 (Lower than before) Then X_TempComp = 400/300 Y_TempComp = 410/310 Z_TempComp = 420/320 3. Applying to all new measurements: X = X * X_TempComp Y = Y * Y_TempComp Z = Z * Z_TempComp Now all 3 axes are temperature compensated, i.e. sensitivity is same as “when the last magnetic calibration was done”; therefore, the calibration coefficients can be applied without modification. 4. Repeat this process periodically or,for every Δt degrees of temperature change measured, if available. ORDERING INFORMATION Ordering Number Product HMC5883L-T Cut Tape HMC5883L-TR Tape and Reel 4k pieces/reel FIND OUT MORE For more information on Honeywell’s Magnetic Sensors visit us online at www.magneticsensors.com or contact us at 1-800-323-8295 (763-954-2474 internationally). The application circuits herein constitute typical usage and interface of Honeywell product. Honeywell does not warranty or assume liability of customer- designed circuits derived from this description or depiction. Honeywell reserves the right to make changes to improve reliability, function or design. Honeywell does not assume any liability arising out of the application or use of any product or circuit described herein; neither does it convey any license under its patent rights nor the rights of others. U.S. Patents 4,441,072, 4,533,872, 4,569,742, 4,681,812, 4,847,584 and 6,529,114 apply to the technology described Honeywell 1 2001 Highway 55 Plymouth, MN 55441 Form # 900405 Rev E Tel: 800-323-8295 February 2013 w20w w . m a g n e t i c s e n s o r s . c o m © 2 0 1 0 H o n e y w e ll I n t e r n a t io n a l In c . www.honeywell.com